Disk Jockey for macOS: Image Creator

Creating an Image for Macintosh
See also:
Creating an Image for Apple II
Creating an Image for the Atari ST
Creating an Image for Amiga
Creating an Image for Akai Samplers
Creating a Blank Image Full of Zeroes
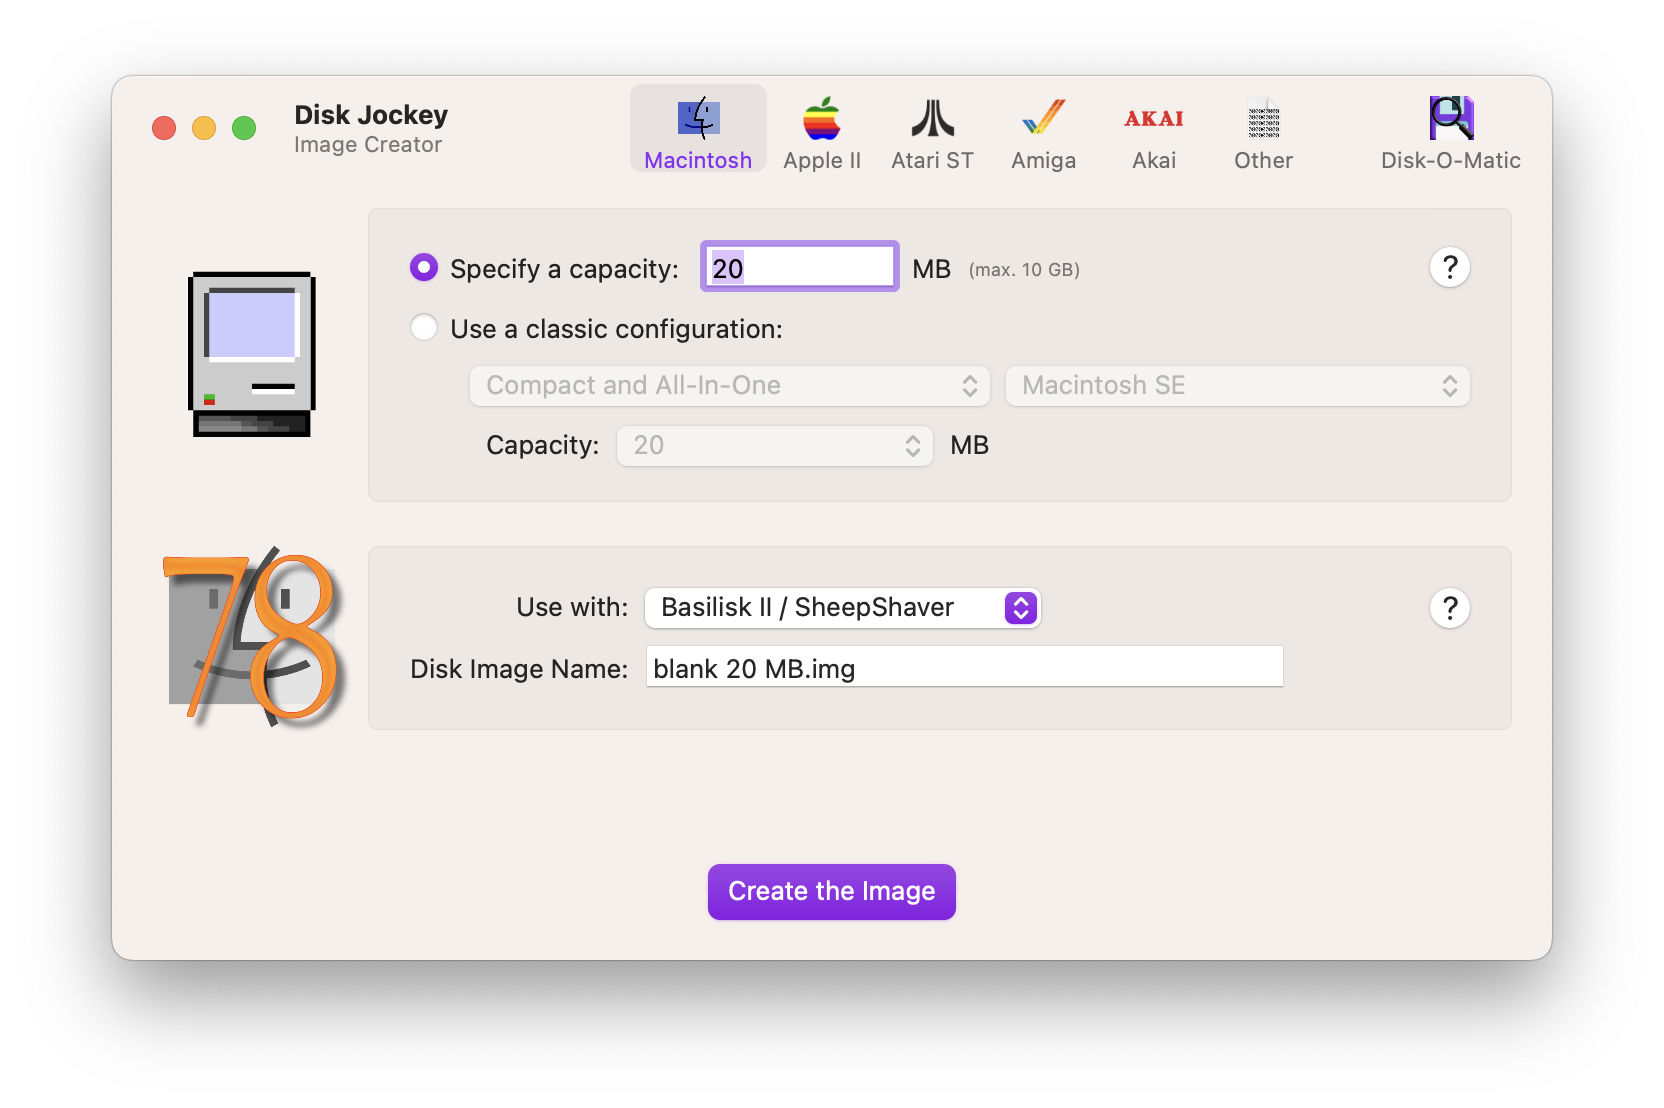
The image creator appears when you start the application. By default, you’ll be creating an image for Macintosh but, using the buttons at the top of the window, you can switch to the creator for Apple II, Amiga, Akai or other formats.
If you’re in a hurry, tell it the size of the disk image you want, tell it what you’re going to use the disk image with, and click the button.
You will be asked to select a folder where to save your image and, an instant later, you should have a fresh new disk image (with a proper name) in the directory of your choice.
The machine or emulator you’ll be using it with will prompt you to format it.
If you’re a stickler for authenticity, Disk Jockey has you covered as well: it knows of most Macs equipped with SCSI, and the capacity of their hard drives. Tell it what Mac you have (or want to emulate) and it’ll tell you the period-accurate sizes that you should use:
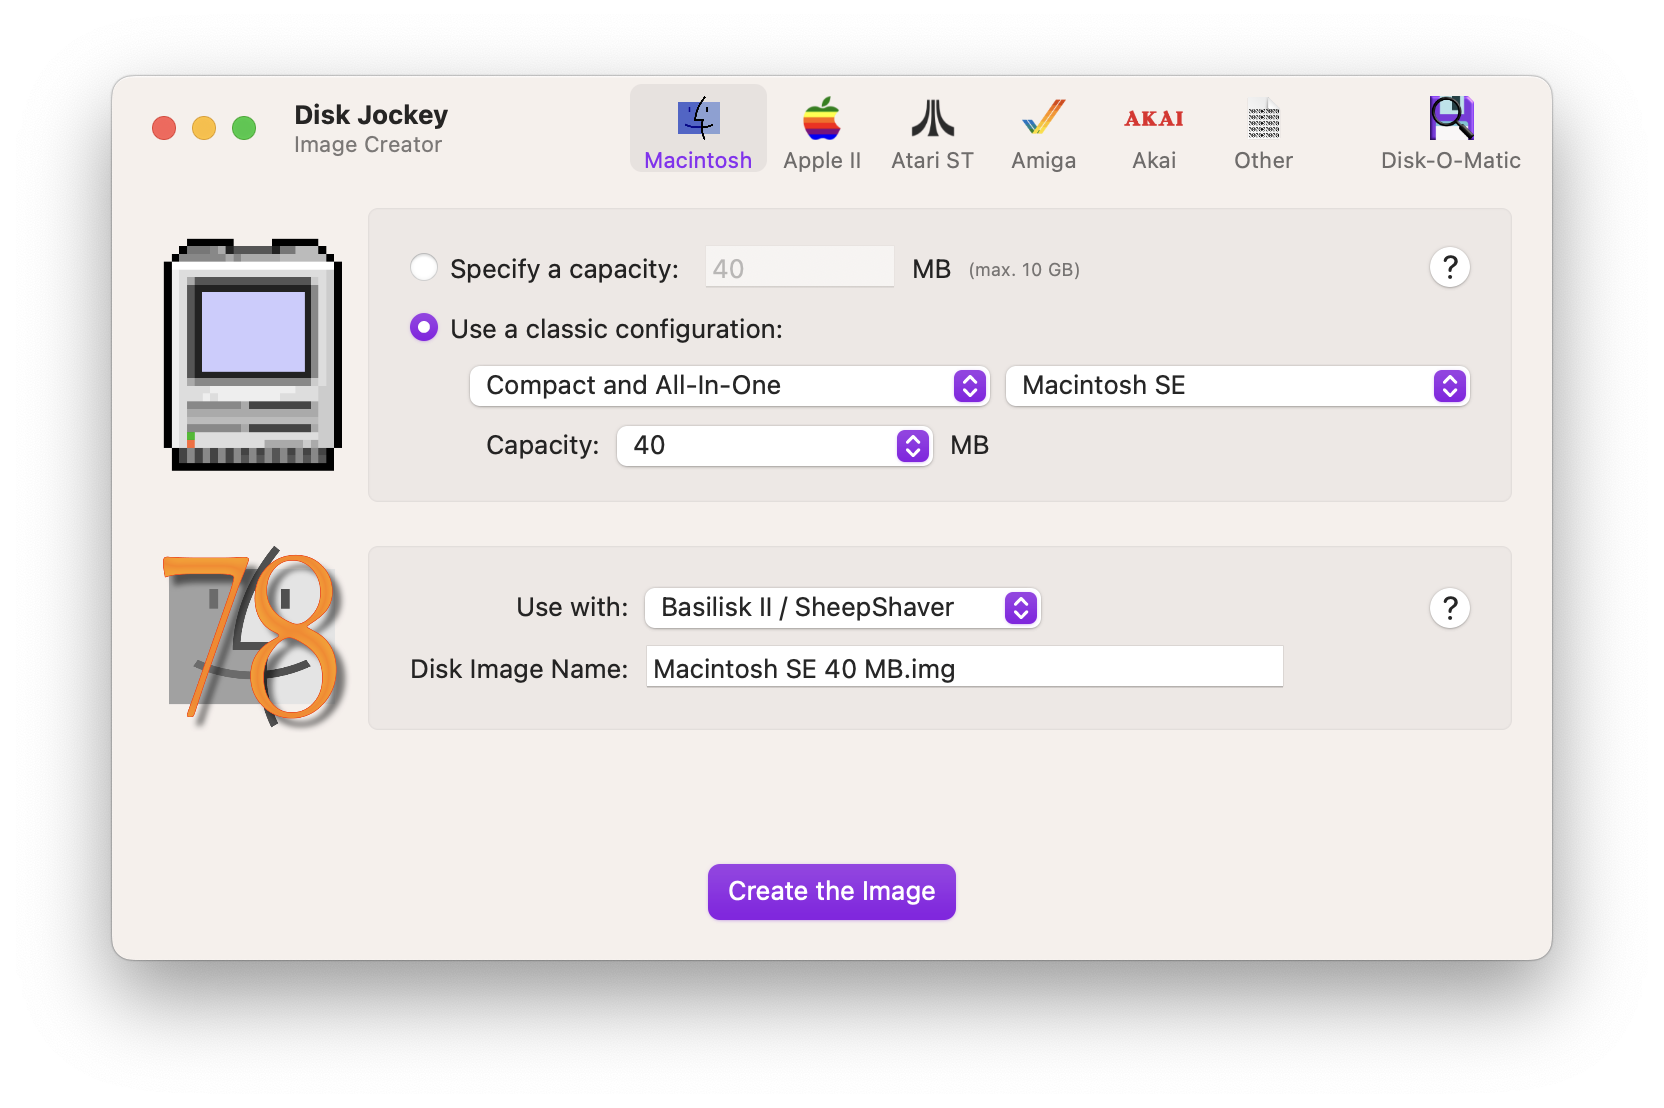
Disk Jockey and SCSI drives
If you tell it you’ll be using the disk image in Snow, BlueSCSI or PiSCSI, Disk Jockey will automatically partition your disk image (creating one volume using all the available space) and install a SCSI driver for you, so it’s ready to go:
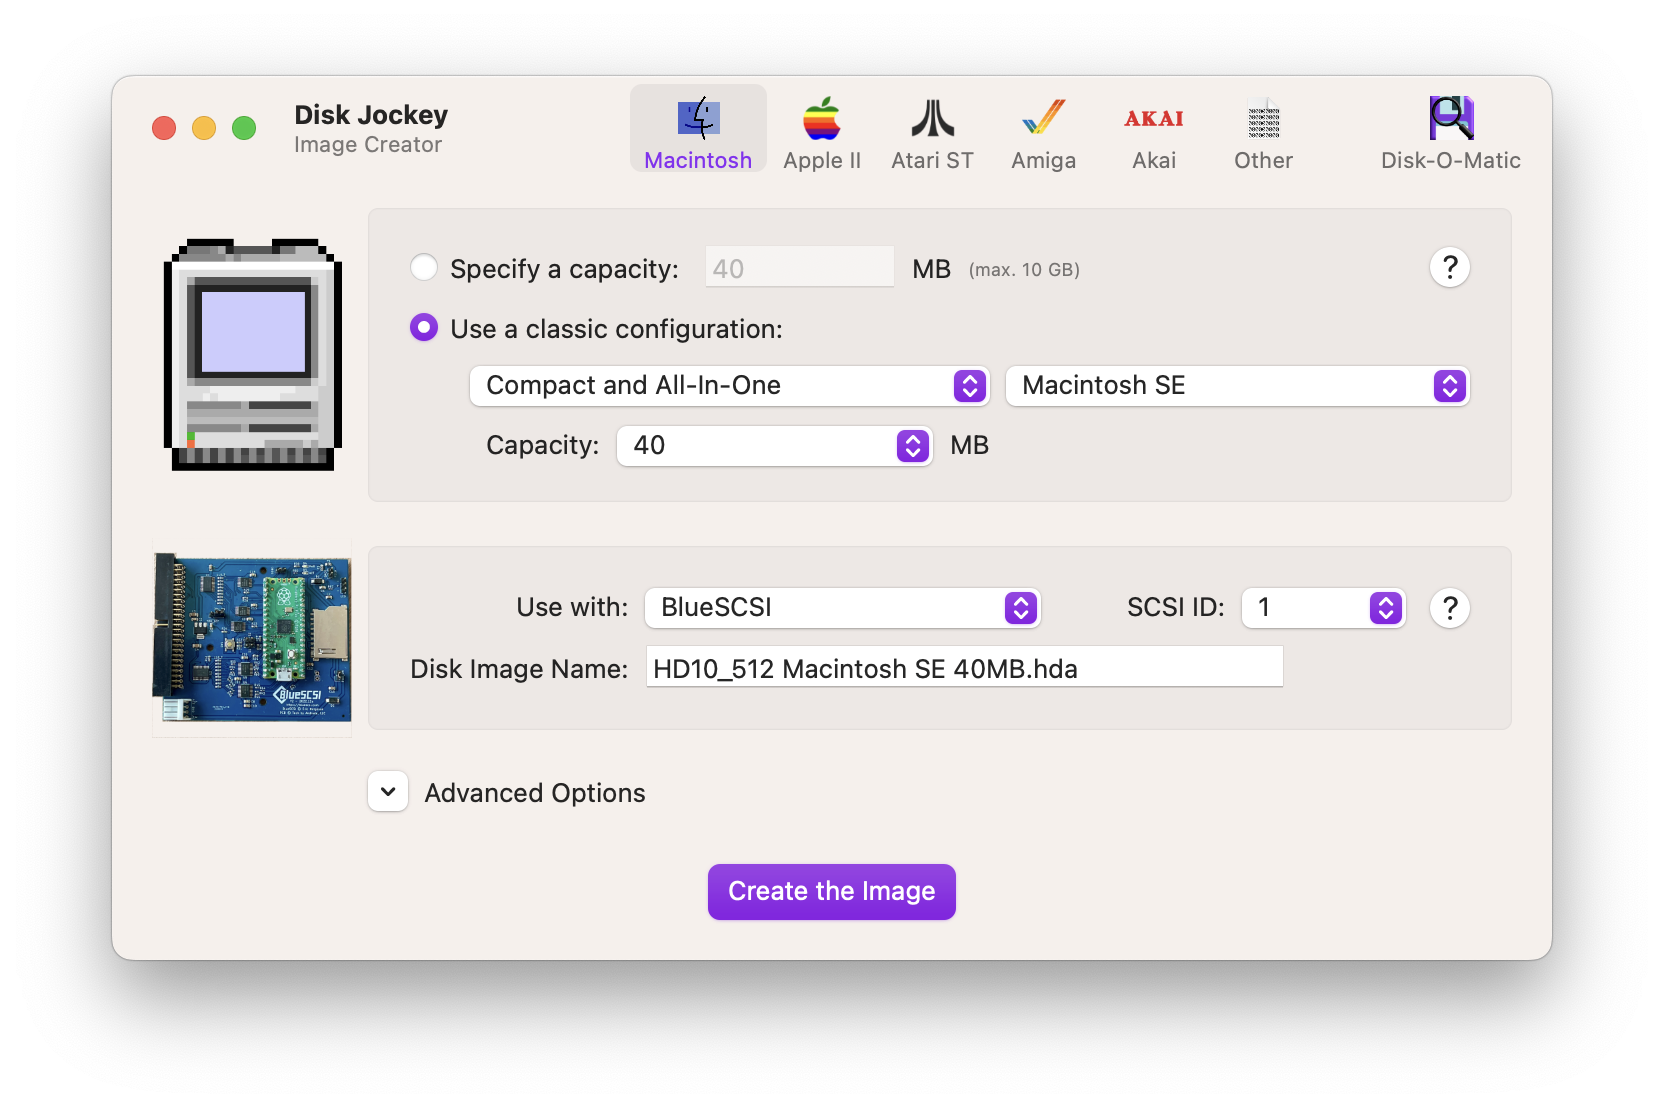
For BlueSCSI, you can also tell Disk Jockey which SCSI ID you want your disk image to be assigned to, and it will name it properly.
Advanced Options
Choosing to create a SCSI drive makes the “Advanced Options” button appear. When you click on it, an additional set of settings appears:
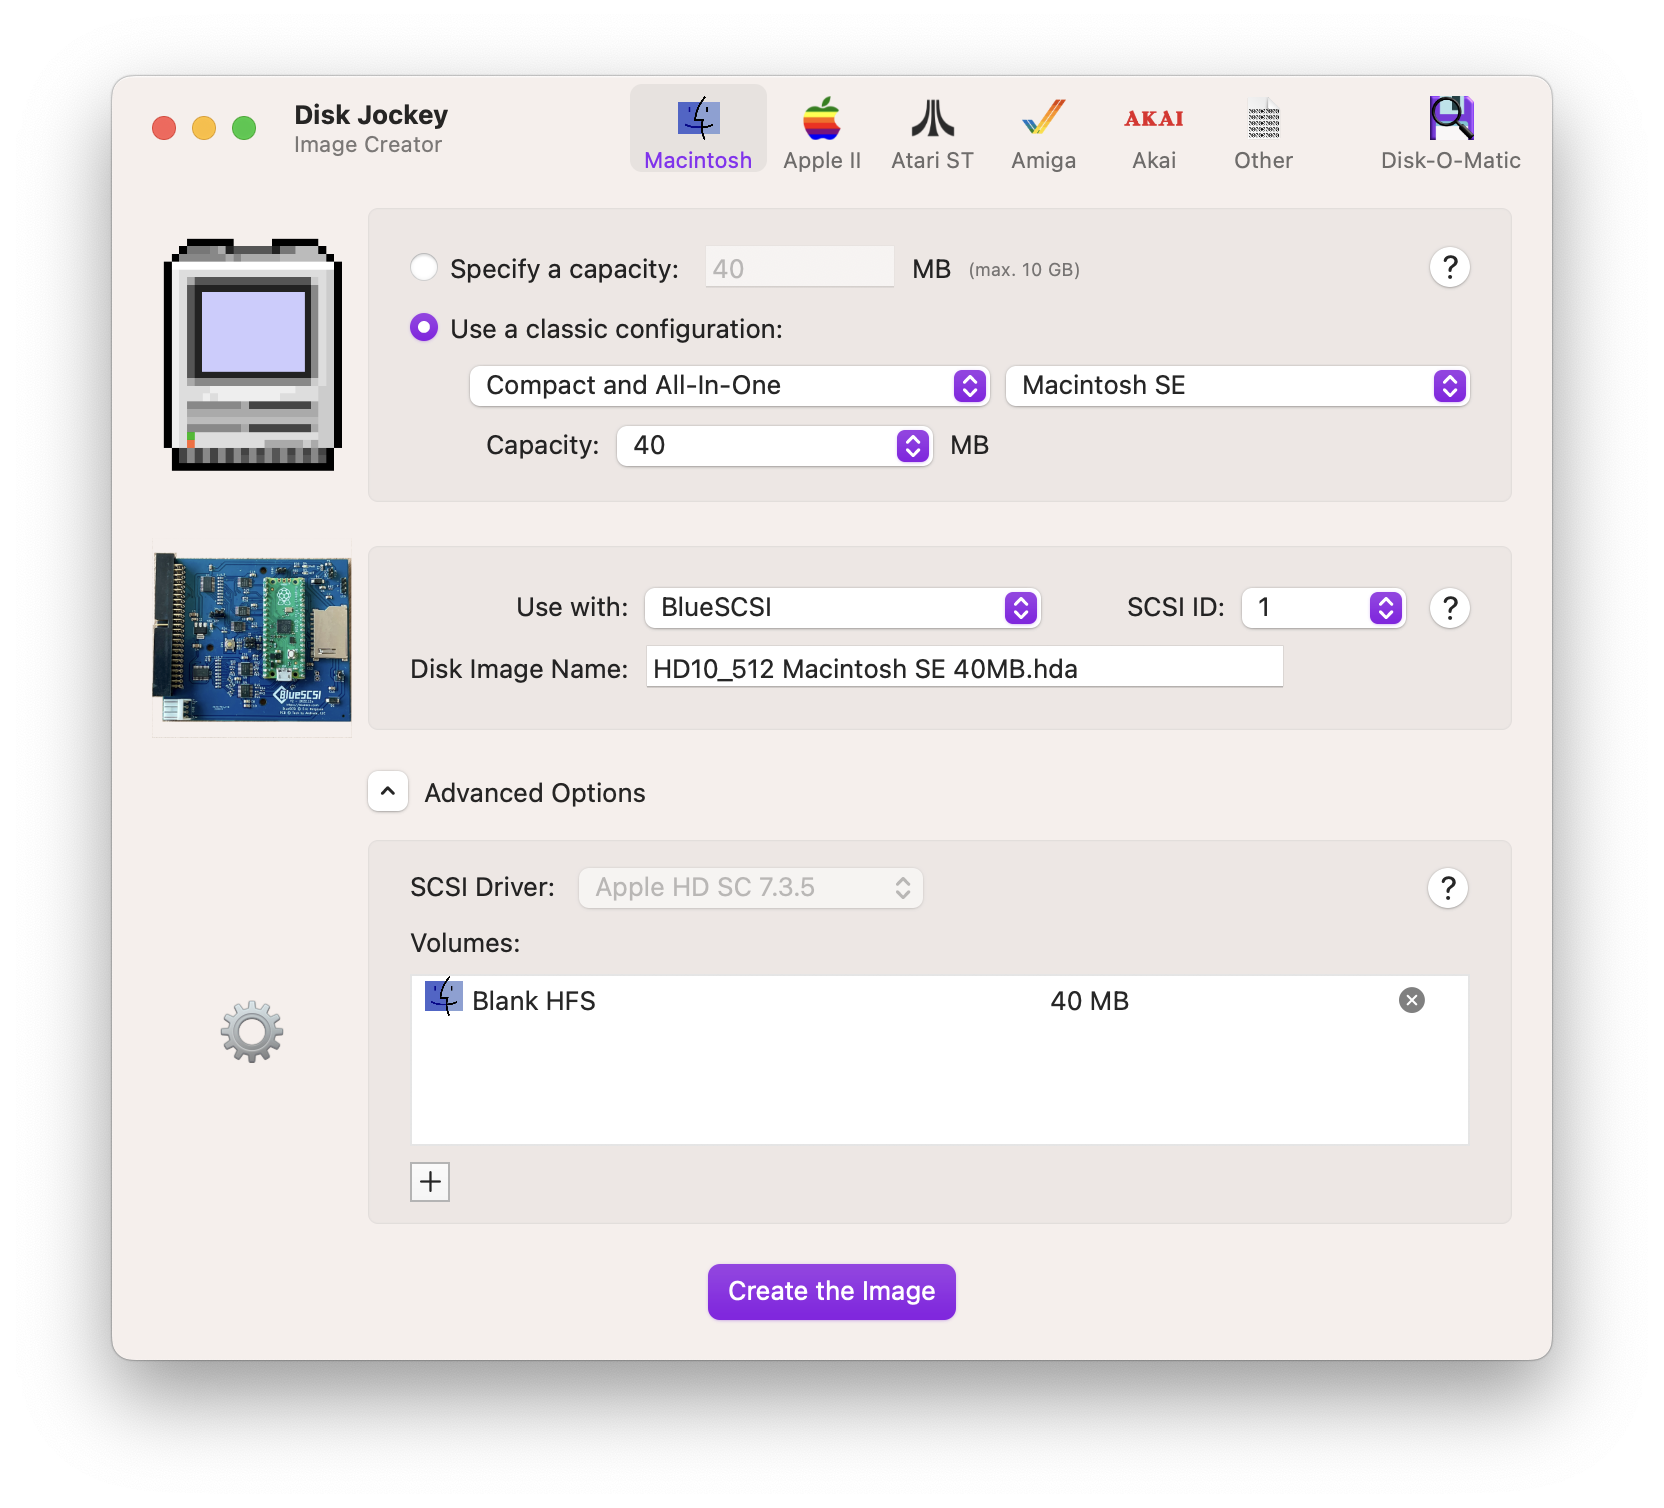
Currently, the “SCSI Driver” option is unavailable. But soon. Maybe.
By clicking on the “+” sign at the bottom of the volume list, you can add new volumes to your device image, in addition to the one that Disk Jockey creates for you. You have several options to choose from:
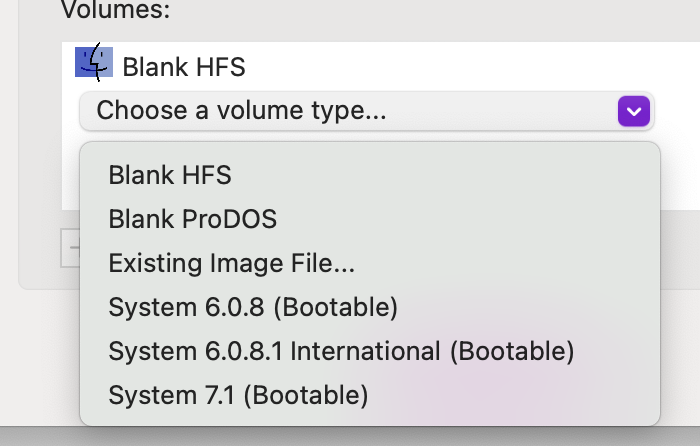
- “Blank HFS” is an additional HFS volume. You will be prompted for a size. The first time this volume will be used in a Mac, you will be asked to initialize it.
- “Blank ProDOS” is an additional ProDOS volume. You will be prompted for a size but note that, due to the way ProDOS was designed, you will not be able to create a partition larger than 32 MB (33,553,920 bytes to be precise).
- “Existing Image File…” will prompt you for an image file (either a volume image or a device image, in HFS or ProDOS format). This image will be scanned and all the volumes found inside will be added as volumes in your device image (you will be able to selectively remove the ones you don’t want).
Do you have a favorite floppy that you want to include? Do you want to insert Total Replay in a SCSI drive? This is the option for you. - “System 6.0.8 (Bootable)” will add a volume that already contains a full installation of System 6.0.8, US version. If you want to be able to quickly start an old Mac, just add this, force the Mac to start with this device image and off you go.
- “System 6.0.8.1 International (Bootable)” does the same, but is intended for non-US Macintosh. Amongst other things, you will get support for non-QWERTY keyboards and additional locale-specific settings.
- “System 7.1 (Bootable)” does the same as above, but with System 7.1.
Note: A traditional partition creator built inside a tool like HD SC Setup 7.3.5 carves an existing hard drive into several volumes. Once all the hard drive’s capacity is allocated to volumes, you’re done.
Because they’re free from the physical constraints of hardware, the device images created by Disk Jockey increase their size according to your needs :) .
Floppies! CD-ROMs! DVDs!
Disk Jockey can also create images of floppies, CD-ROMs and others. Tell it you want to use a classic configuration and look under “Other”.

Creating an Image for Apple II
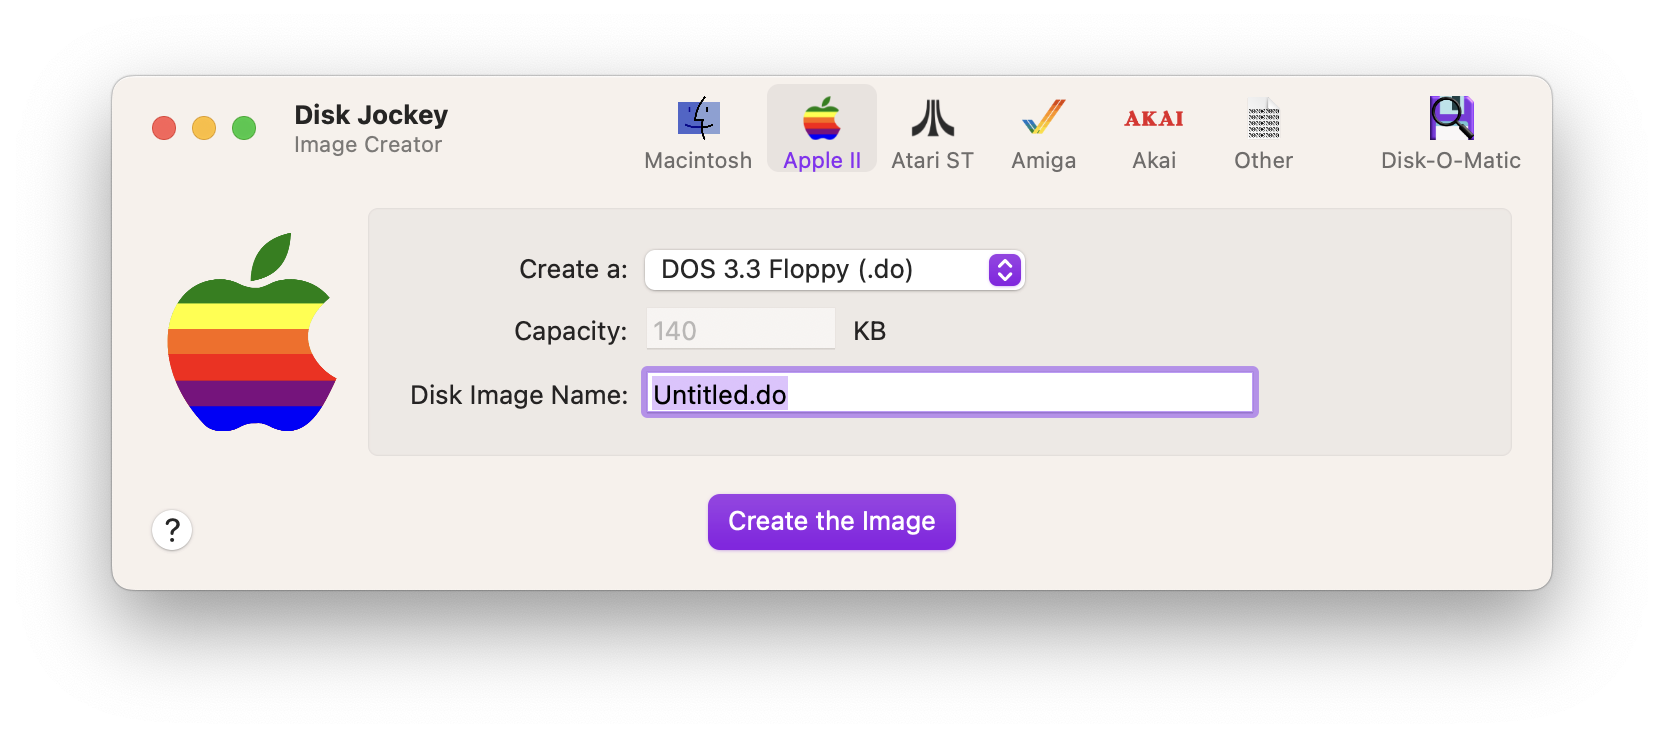 Disk Jockey lets you create several types of images for the Apple II.
In addition to the standard 140 KB floppy images (in DOS 3.3 and ProDOS format), Disk Jockey can also create a hard drive image, which the Apple II sees as a ProDOS floppy of a larger size. ProDOS has a maximum addressable capacity of 32 MB and cannot work with anything beyond that.
Disk Jockey can also generate a set of 4 ProDOS image files that can be used with the SP2SD.
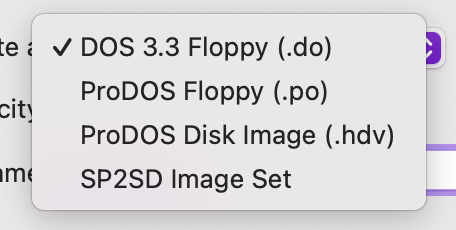
Note: There is a bit of confusion around the proper naming of Apple II images. The “.dsk” extension is often used for DOS 3.3 images but, sometimes, it might also be used for images in the ProDOS format. To avoid confusion, Disk Jockey uses “.do” for DOS 3.3 images and “.po” for ProDOS images. But you’re free to name them whatever you wish.

Creating an Image for the Atari ST
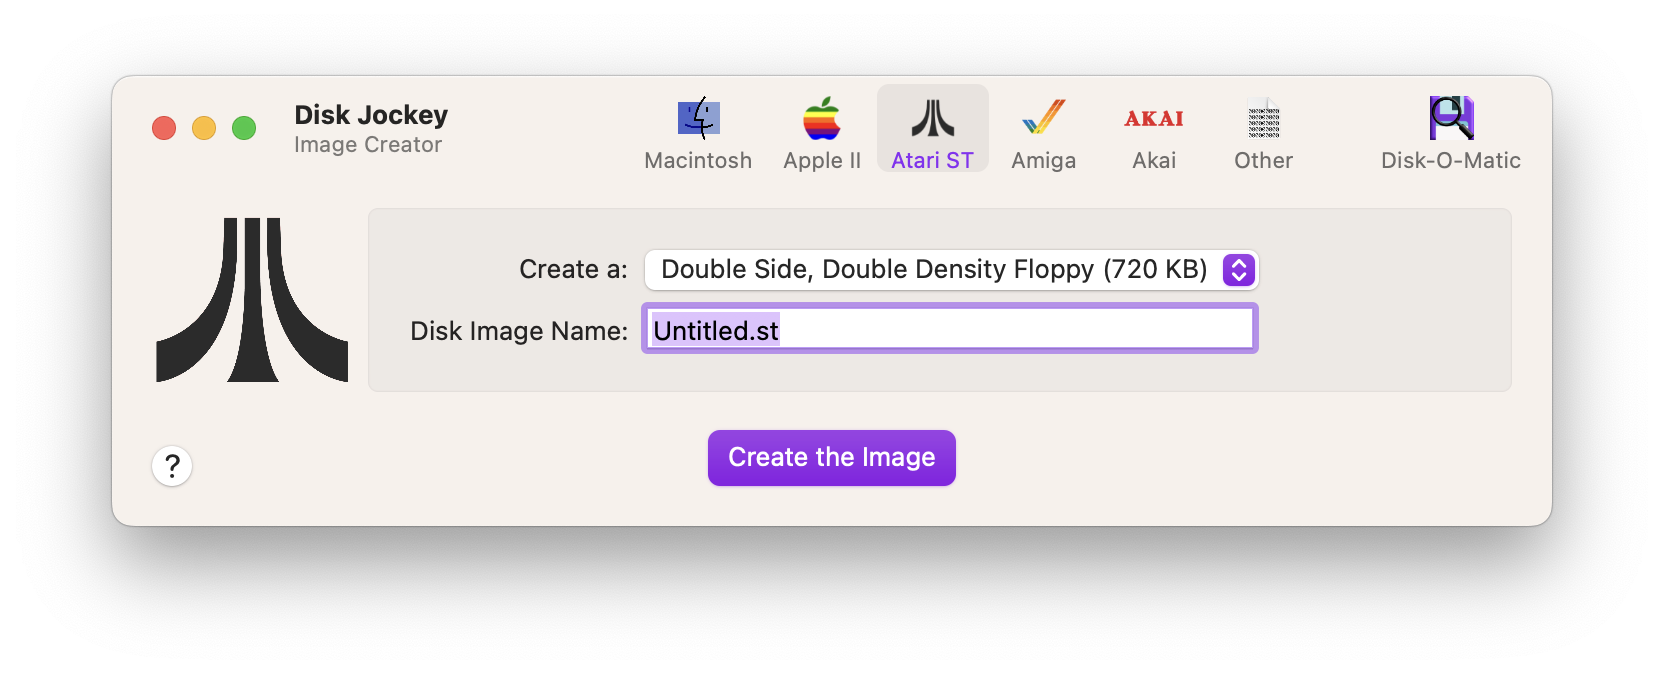 Disk Jockey creates can create empty Single Side Double Density (360 KB), Double Side Double Density (720 KB), and Double Side High Density (1440 KB) floppy images formatted in the FAT12 format.
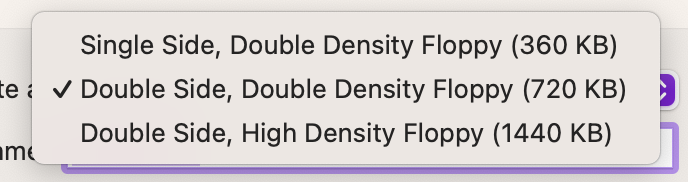
Note that the SSDD format was only used in the early days of the ST. The DSHD format was only used in later models of the TT, and in the Falcon. DSDD is very often the common choice.

Creating an Image for Amiga
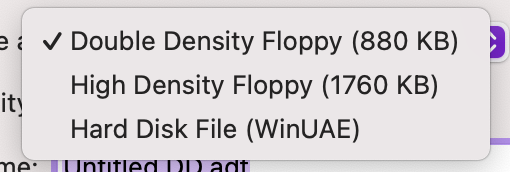
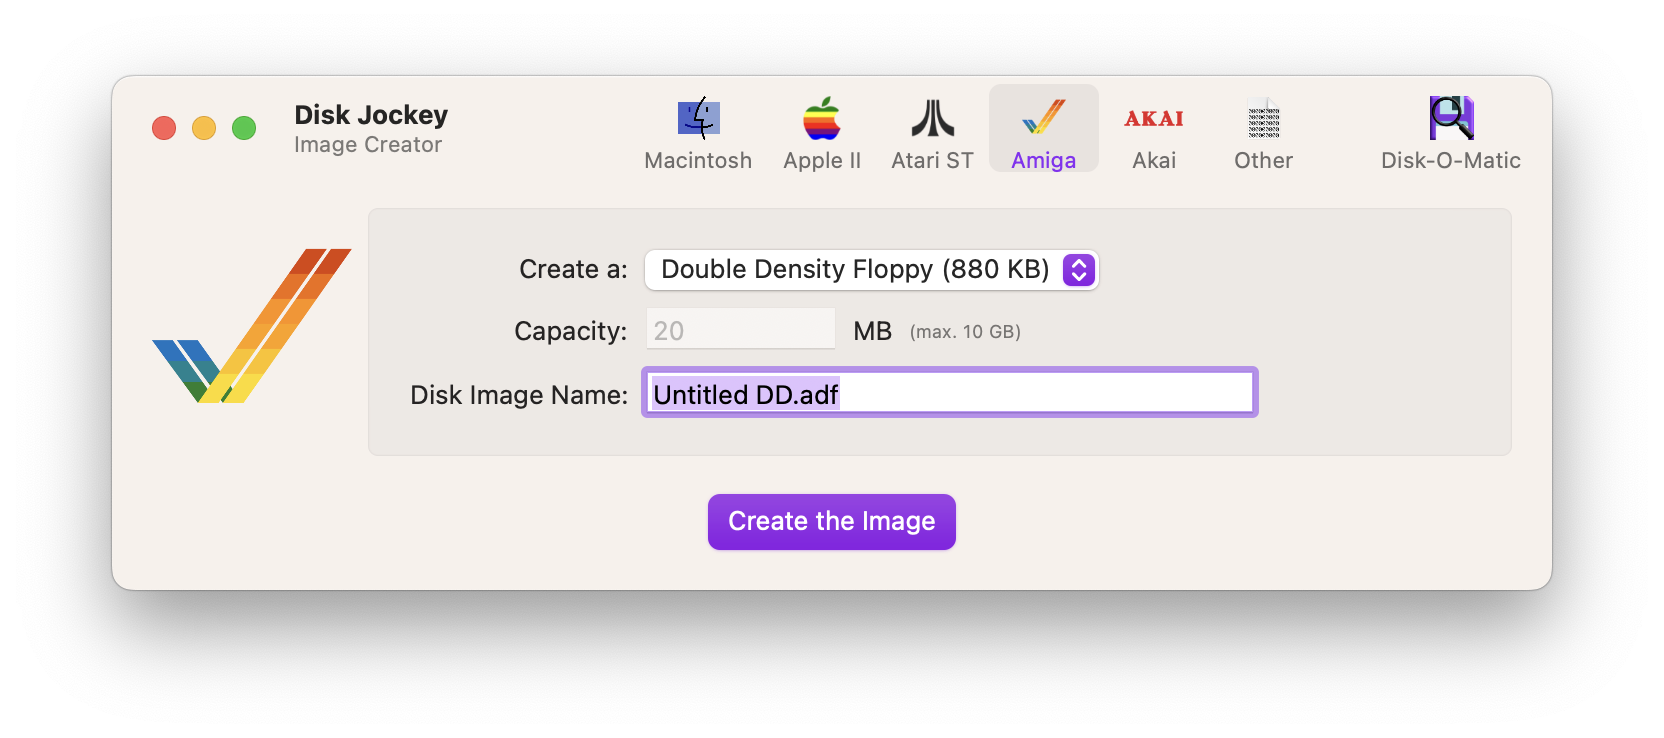 Disk Jockey creates can create empty Double Density (880 KB) and High Density (1760 KB) floppy images formatted in the OFS format.
It can also create an empty hard disk file that can be used in many Amiga emulators, including WinUAE and others.
By default, the Amiga hard disk files you can create have a maximum capacity of 10 GB, But this can be changed if you enable R.O.N. mode.
Creating an Image for Akai Samplers
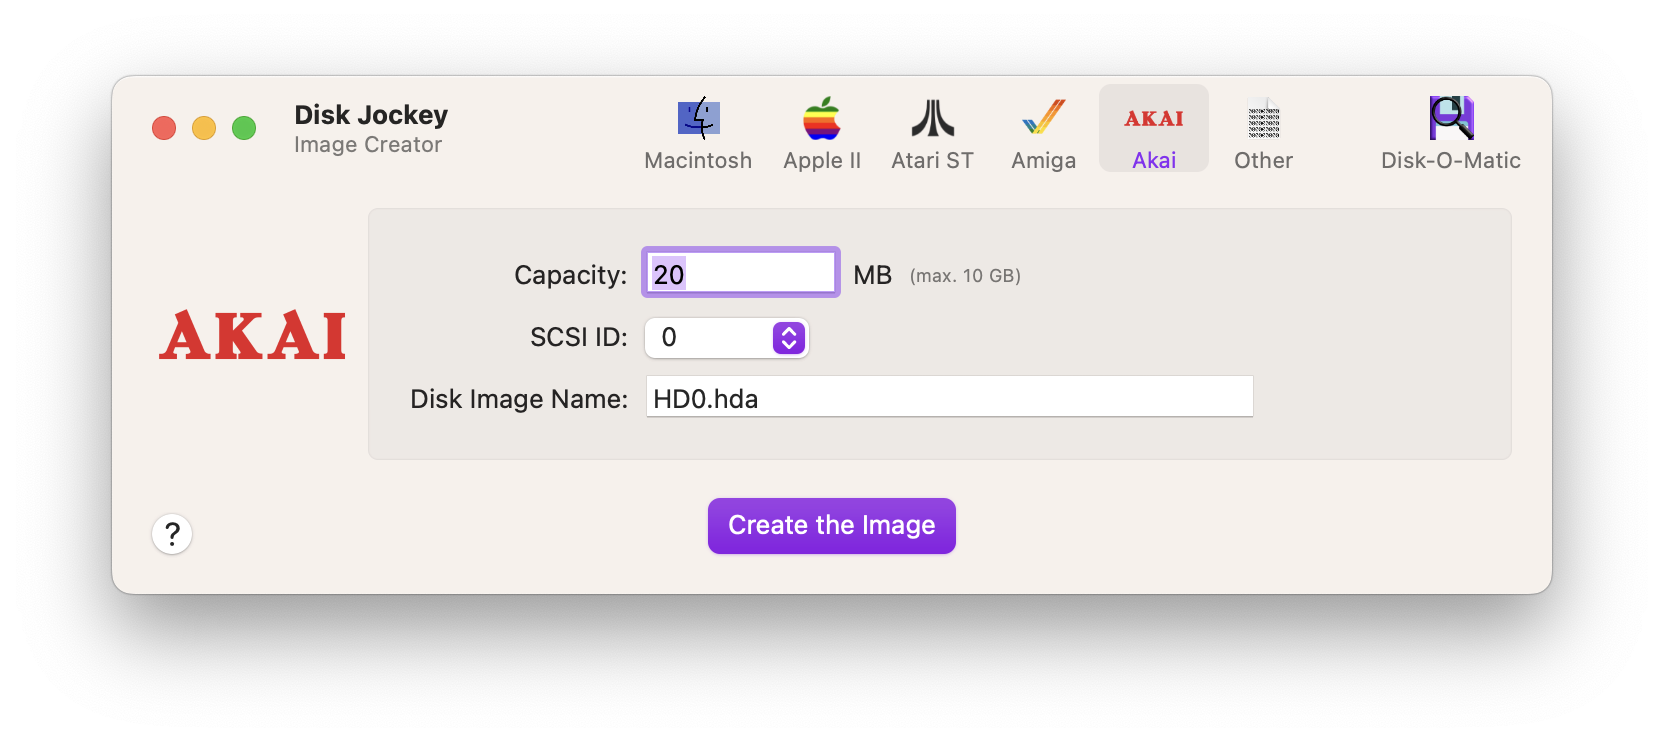
Disk Jockey creates images for Akai samplers and names them properly for their use in BlueSCSI.
Note that the sampler generally (always?) reserves SCSI ID 6 for itself. Avoid assigning a disk image to that ID, or make sure the default is changed in the sampler.
Also, you will need to partition your disk image using the sampler’s built-in menus. Keep im mind that those partitions cannot exceed 510 MB.
By default, the Akai hard disk files you can create have a maximum capacity of 10 GB, But this can be changed if you enable R.O.N. mode.
Creating a Blank Image Full of Zeroes
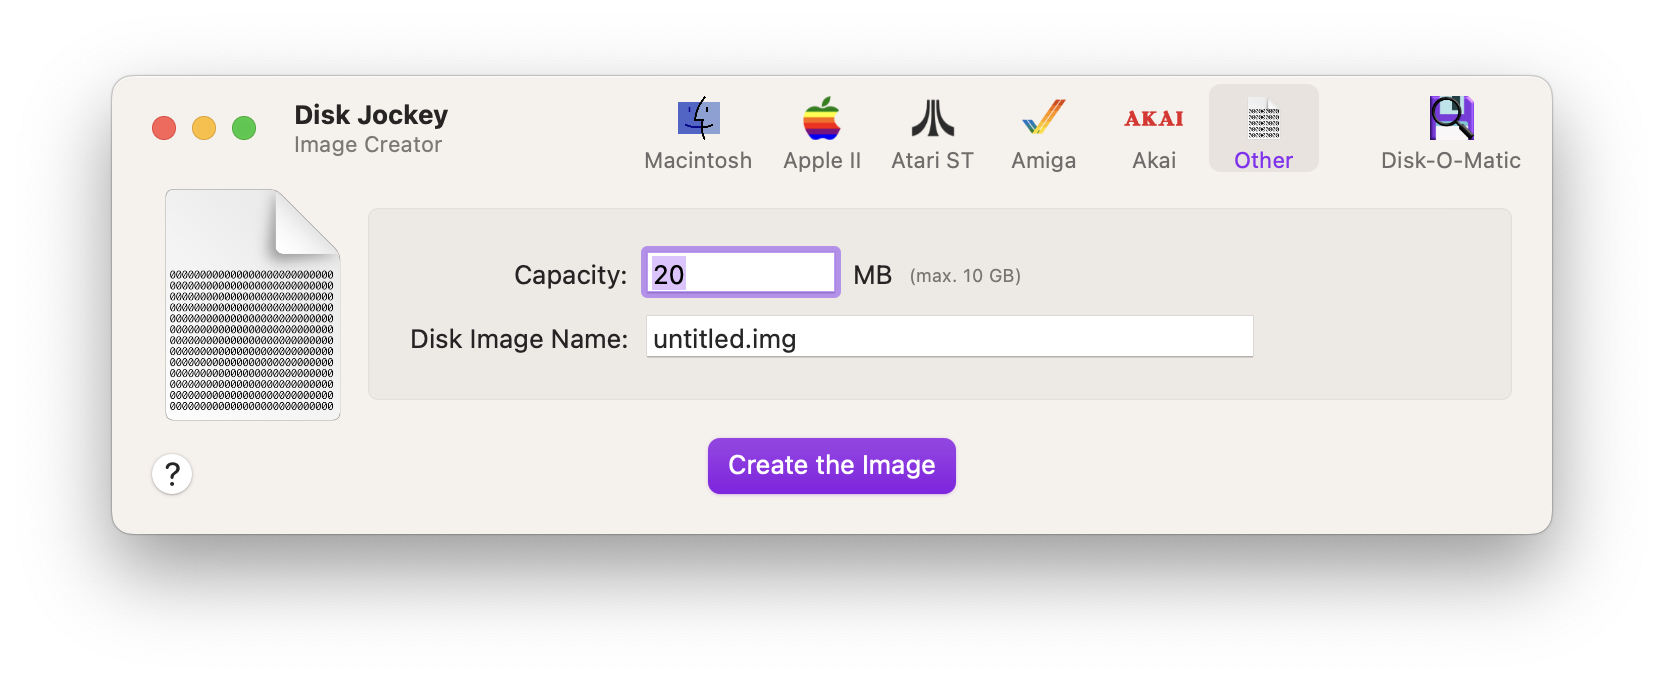
If you just want a blank image with nothing in it, simply select the “Other” image creator. Specify a size and Disk Jockey will create the image for you. The way it creates the image is more efficient that the dd Unix tool, and faster.
By default, the empty hard disk files you can create have a maximum capacity of 10 GB, But this can be changed if you enable R.O.N. mode.