Disk Jockey for macOS: Disk-O-Matic
Disk-O-Matic lets you look inside your disk images. To start it, click on the Disk-O-Matic button on the Disk Jockey window and select a disk image to analyze, or drag the disk image to any Disk Jockey window). It then quickly scans your image and displays its contents.
The following image types are supported:

Macintosh:
- HFS+ volumes and partitions
- HFS volumes and partitions
- MFS volumes and partitions
- Images in Disk Copy 4.2 format
- Many ISO and Toast images
Note that Disk Copy 6 (NDIF) images are detected, but they contents will not be shown.

Apple II:
- ProDOS volumes and partitions
- DOS 3.3 volumes
- Images in 2IMG format

Atari ST:
- TOS floppy images in raw format (.ST)

Amiga:
- ADF floppy images
- HDF disk images (WinUAE)
- Partitions inside hardfiles (like those created by HDInstTools in the Workbench)
Drag an image to the Disk Jockey window (or use the open menu item) and Disk-O-Matic appears. It quickly scans your image and displays its contents.
There are two main types of images: Single Volume images and the more complex Device images.
Single Volume Image
An image with a single volume is typically a floppy disk.
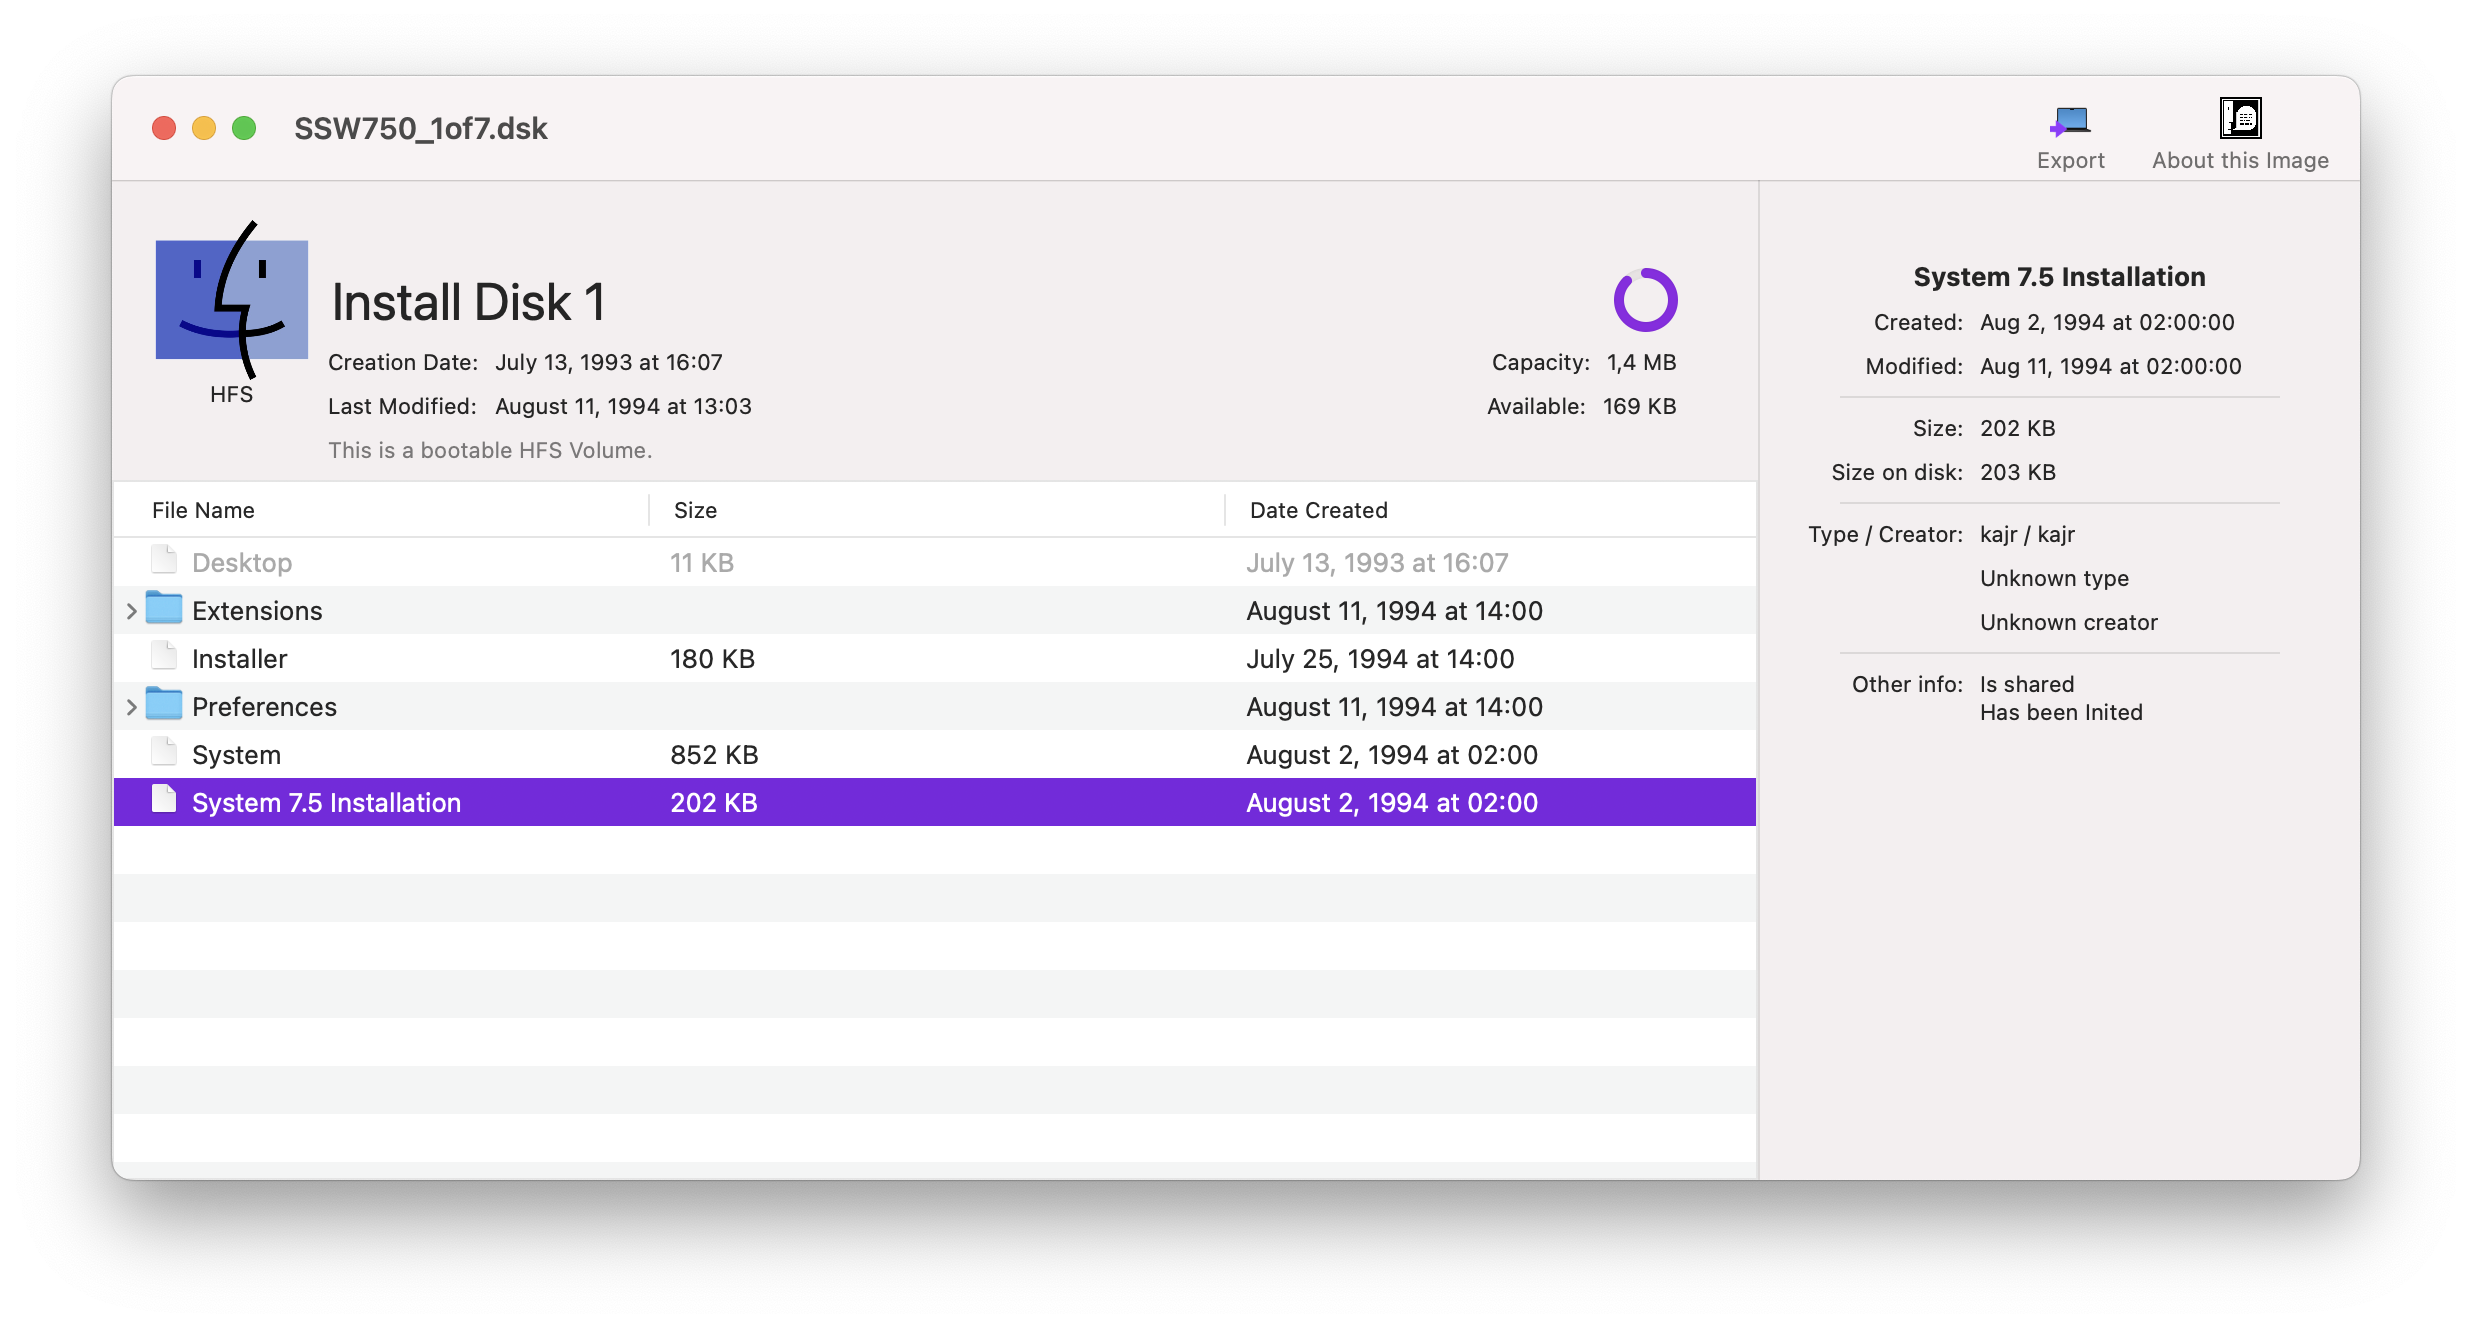
Examples of such images are a Mac floppy in HFS format, an Apple II DOS 3.3 or ProDOS floppy, an Amiga floppy in the ADF format and others.
 This is Disk-O-Matic showing the contents of a disk image containing a single volume.
General information about the disk is displayed, such as its creation date, its capacity and the name of the volume as it will appear to the computer’s OS.
You can browse through the contents of the volume and, when you click on a file name, you will see additional information appear.
Device Image
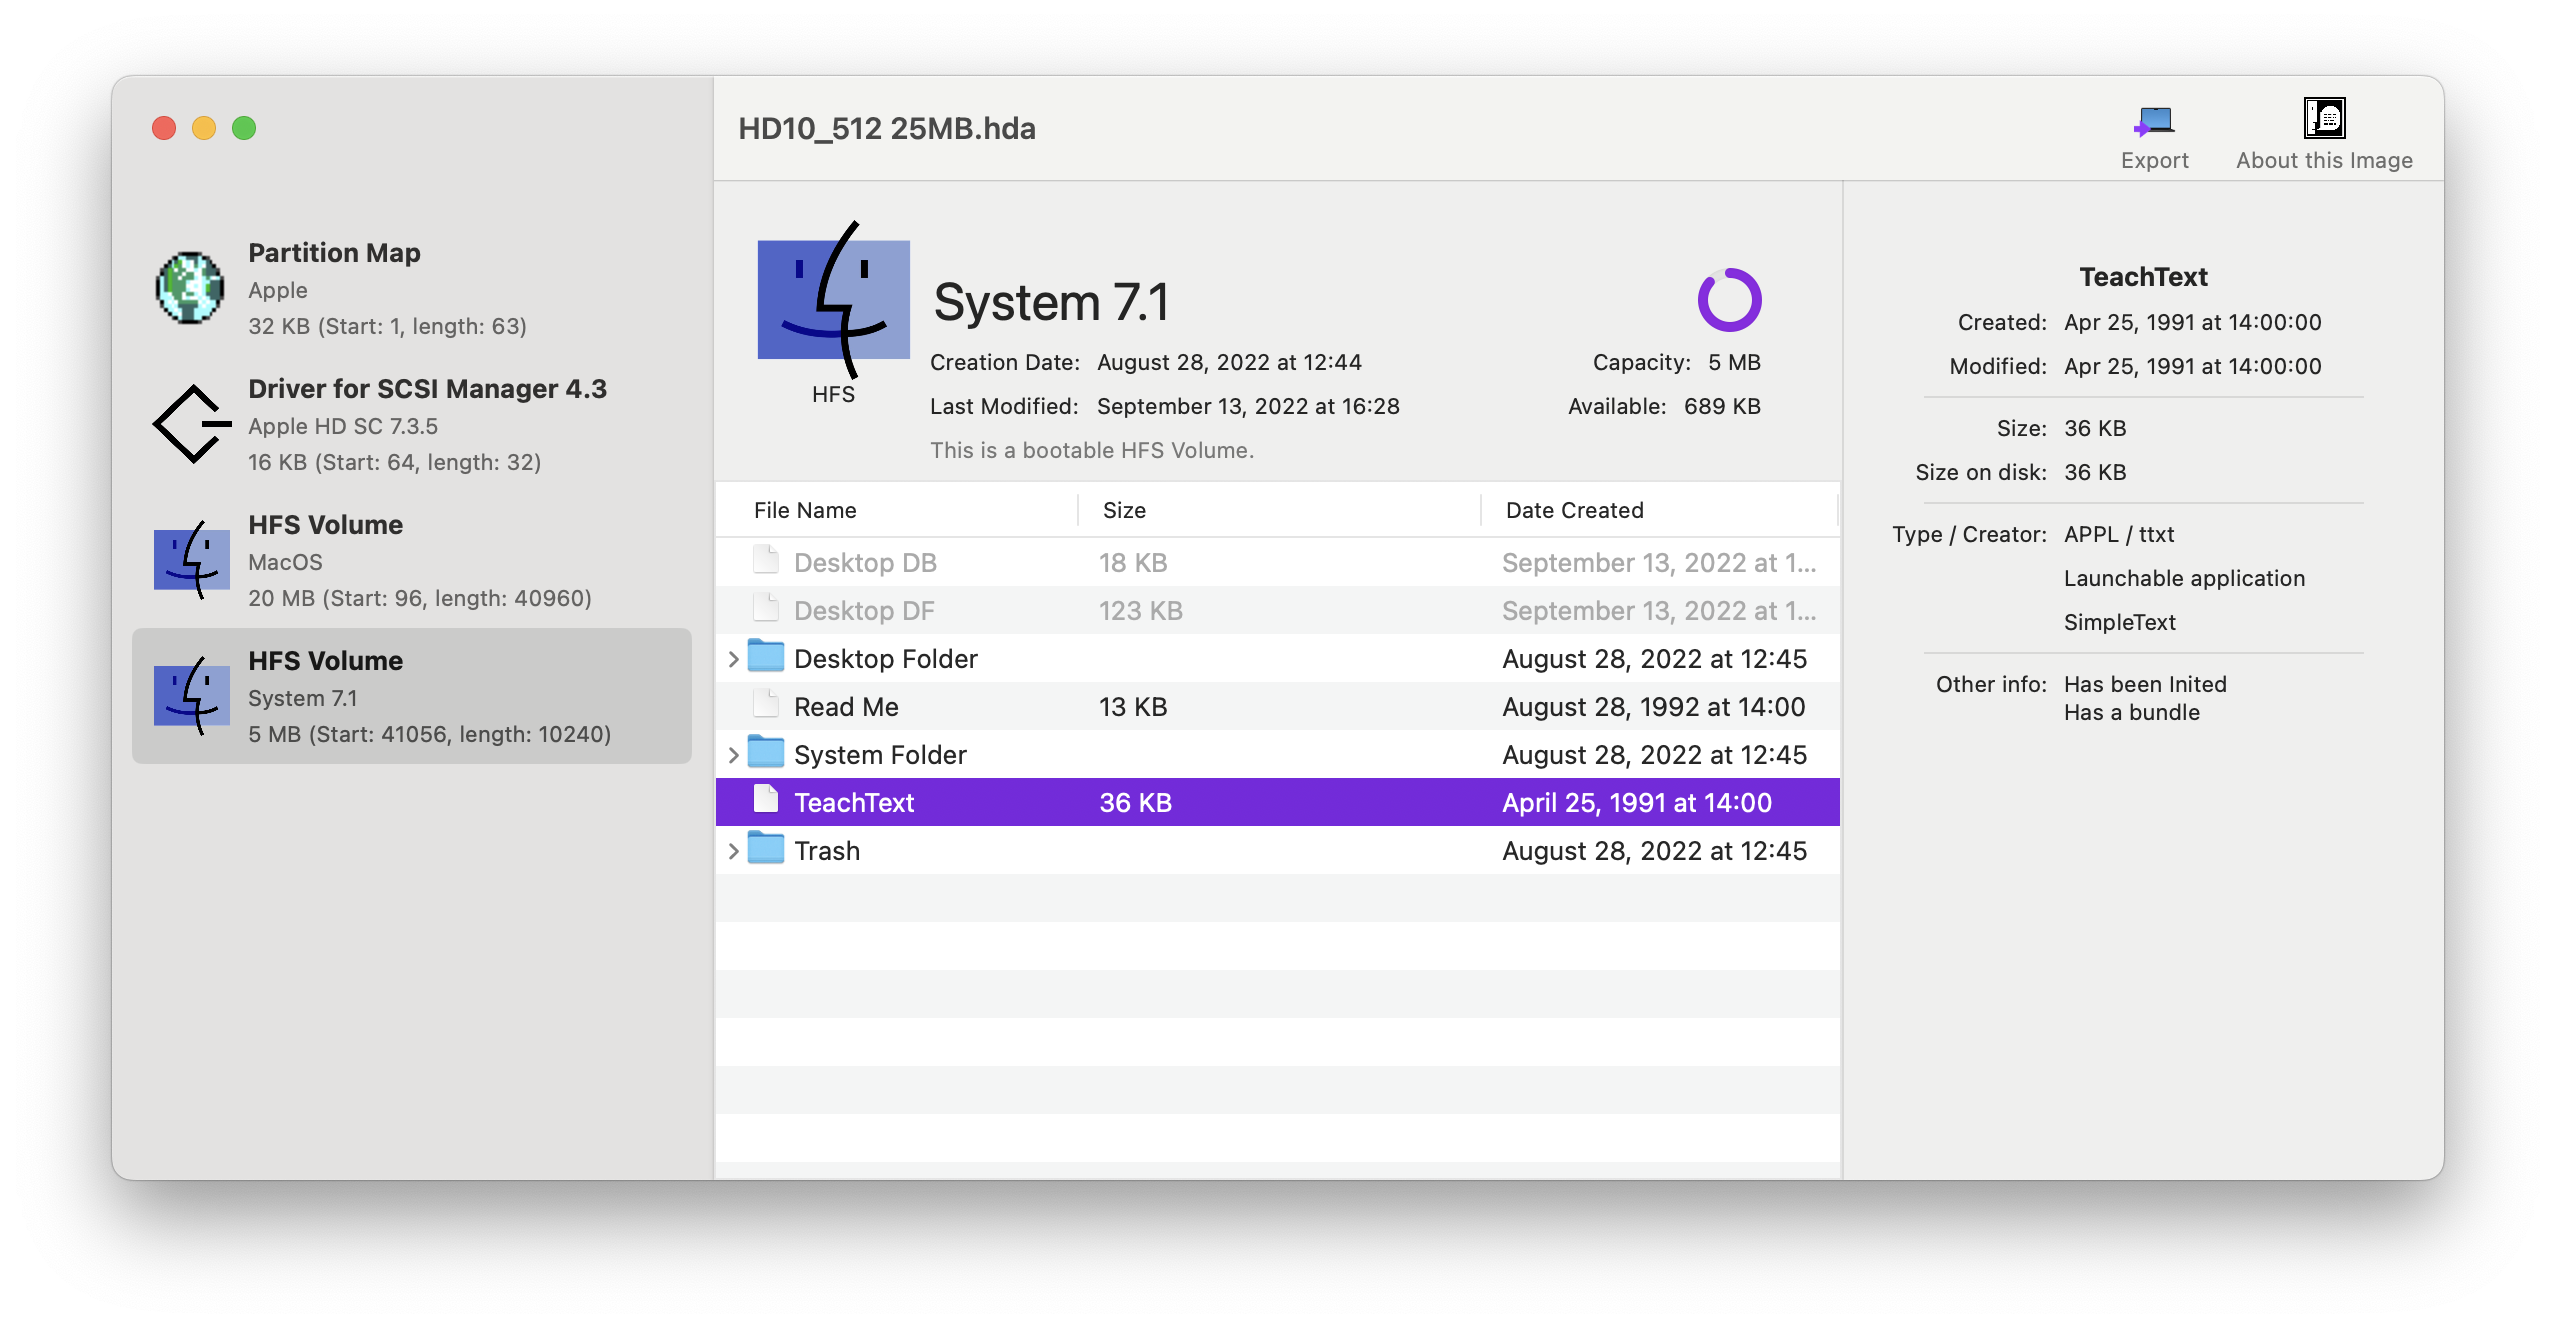
A Device image contains the entire structure of a physical hard drive. This includes things like multiple partitions containing separate volumes, drivers (SCSI or others) and more.
If you open a Device Image (used by BlueSCSI or RaSCSI, for example) to Disk-O-Matic, the window will be slightly different:

A partition browser is now displayed on the left side of the window, allowing you to see the various volumes present in the Device Image as well as other details such as the SCSI driver. Clicking on each provides more information.
The Toolbar
Depending on what you currently have selected, one or more icons may become active in the toolbar.
Export

(The Export icon might differ depending on what your Mac looks like :))
As you browse through the files and folders on your disk image, the “Export” button will appear whenever your currently selected file or folder is exportable by Disk Jockey.
When you click the button, you will be prompted to specify a location where to save the file (or the folder and all its contents).
Note that, in the case of HFS, HFS+ and some ProDOS files (known as Extended Files), resource forks will be preserved.
At the bottom of the export dialog box, you will find an option allowing you to export resource forks as a separate file:

When unchecked, resource forks will be created and attached properly to the file as an extended attribute (com.apple.ResourceFork). This is the prefered default if you wish to preserve your files and move them around.
When checked, a second file with a “.rsrc” extension will be created. This is useful when you want to look inside the resource fork of a file without Terminal manipulations, but will render the file unusable on the original computer, or an emulator.
Create a Device Image

When you open a Mac OS Single Volume Image, this button lets you create a new Device Image containing your volume, and the various parts needed to use this image in BlueSCSI or RaSCSI.

This is especially useful if you have, for example, floppy images or CD images that you’d like to use as a device in BlueSCSI.
Create a Volume Image

When you open a device image and select one of its volume partitions, this button appears and lets you extract the partition as a brand new volume image.

Having a volume image extracted from your device can be very useful. For exemple, you could extract a partition from a device image and inject it in another using the Advanced Options of the Image Creator.
Convert To Regular Image

This button appears when you have opened a Volume Image in a format like Disk Copy. It allows you to convert it to a regular, raw Volume Image (in other words, a straight HFS volume).
Replace LIDO

The LIDO SCSI driver used to be a popular versatile replacement for Apple’s HD SC Setup 7.3.5 driver. In modern solutions like BlueSCSI, this driver is known to cause slowdowns.
If this button appears, it means that Disk Jockey has detected that your disk image contained the LIDO driver and offers to create a new disk image, identical to yours, but with the regular (and reliable) Apple HD Driver 7.3.5.
Save as JSON

This button lets you export the details of your disk image as a JSON file.
At the bottom of the dialog box, you will find the option allowing you to include full details about every file and folder in your disk image.

Keep in mind that, if you have a large image containing many files, the export could take a while.
About This Image

This button will give you some additional, non-crucial info about your disk image. It could be a tip or some historical tidbit.