Disk Jockey for Windows
Disk Jockey lets you create disk images that work in devices like BlueSCSI, Floppy Emu and PiSCSI, as well as in emulators like Snow, Basilisk II and Mini vMac.
All versions of Disk Jockey are free 🎉, but you can always buy me a coffee if you want:
If you like it, say hi on Mastodon, on BlueSky or send an e-mail to dj at onegeekarmy.eu (in one word). I’m OneGeekArmy#1358 on Discord.
New version 1.6.1!
Disk Jockey for Windows now:
- Supports creating images for the Snow emulator
- Extracts HFS, MFS and ProDOS partitions from existing Macintosh device images to insert them into your own disk images (no more restriction to .img or .image files)
- Has a spiffy new icon (thanks, maxtron95!)
Download

Windows
Disk Jockey runs on Windows 7, 8, 10 and 11. It requires the .NET 6 framework.
If you already have .NET 6 installed on your Windows machine, pick one of these (make sure you choose the link that matches your system architecture):
Disk Jockey for Windows (x64)
Disk Jockey for Windows (x86)
Disk Jockey for Windows (arm64)
If you do not have .NET 6, you can download one of these instead. The application will be larger but it will work the exact same way:
Disk Jockey for Windows (x64 without .NET 6 installed)
Disk Jockey for Windows (x86 without .NET 6 installed)
Disk Jockey for Windows (arm64 without .NET 6 installed)
Creating your First Image
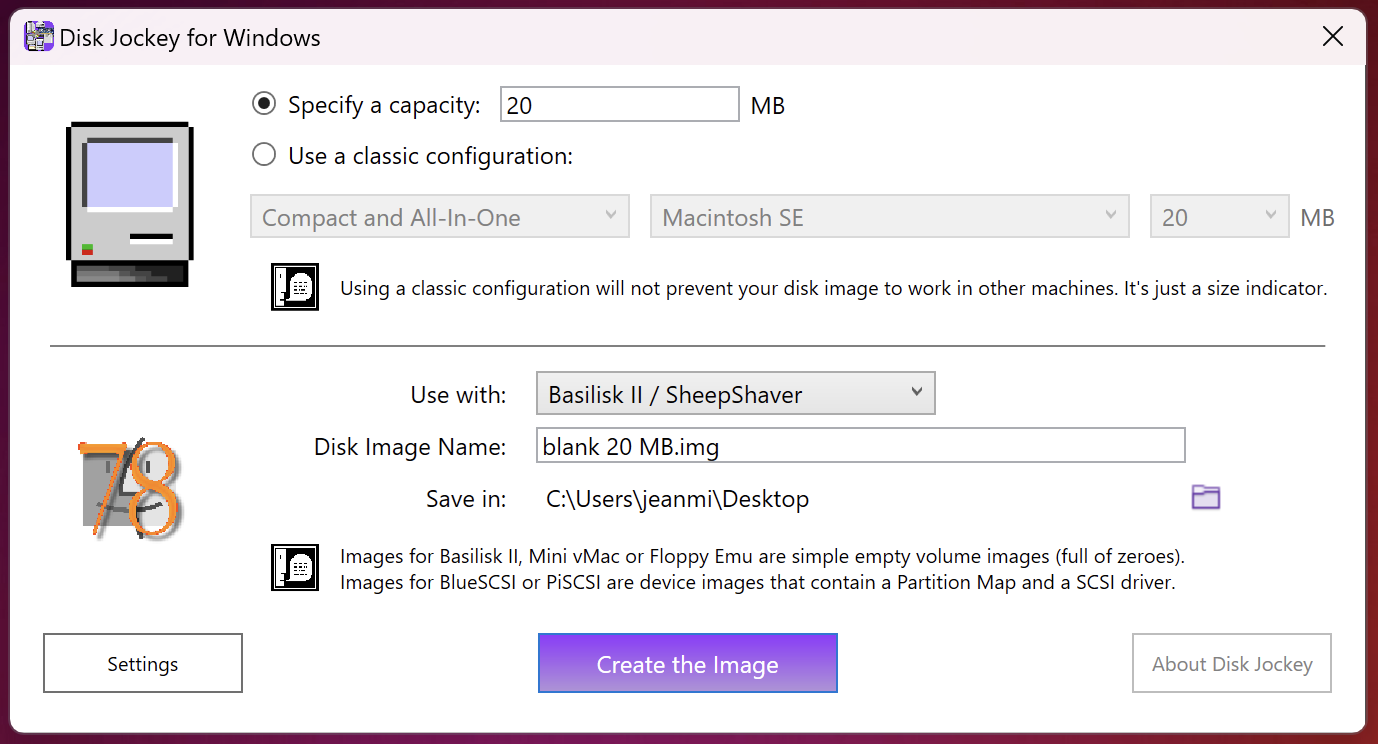
You can very simply create an image by first telling Disk Jockey it the size of the disk image you want and what you’re going to use the disk image with. Once you click the “Create the Image” button, you should have a fresh new disk image (with a proper name) in your Desktop folder. The machine or emulator you’ll be using it with will prompt you to format it.
If you’re a stickler for authenticity, Disk Jockey has you covered as well: it knows of most Macs equipped with SCSI, and the capacity of their hard drives. Tell it what Mac you have (or want to emulate) and it’ll tell you the period-accurate sizes that you should use:
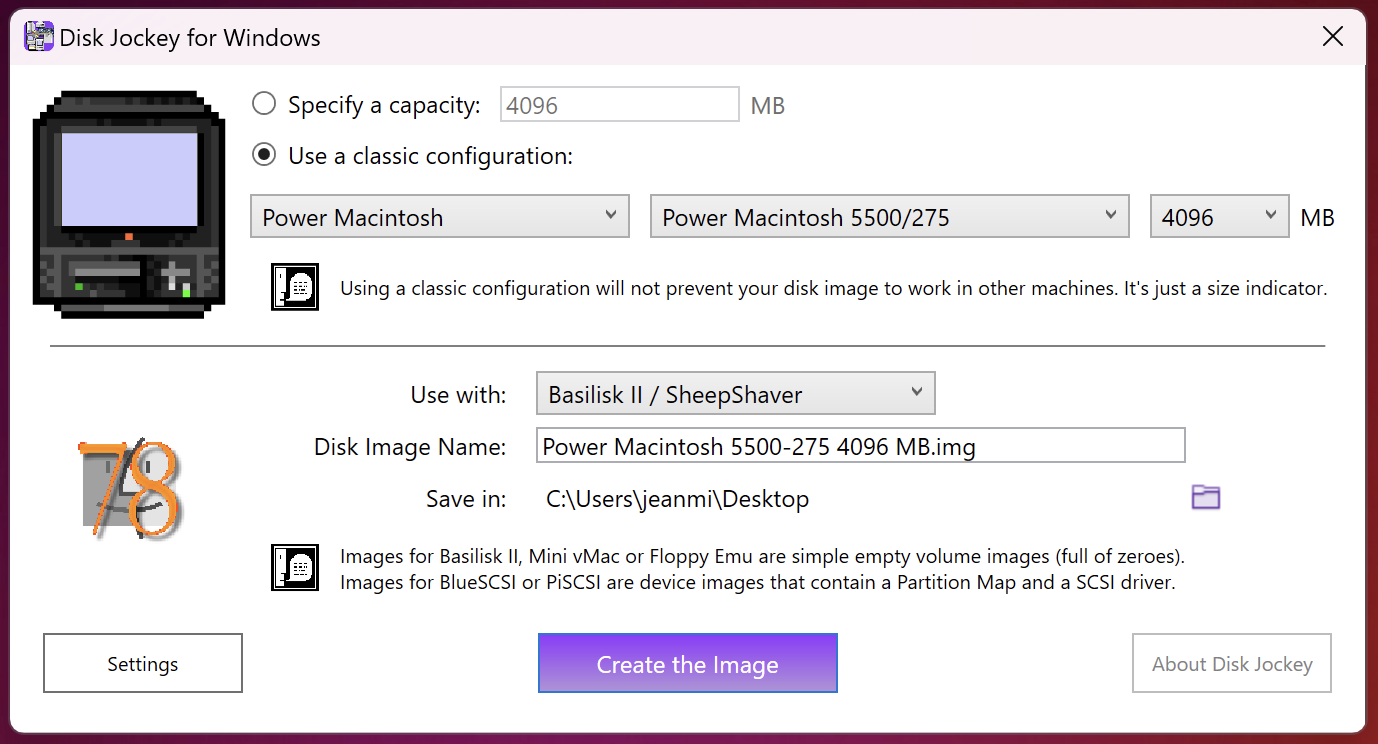
Note that this does not mean that your disk image will only work on the Mac you specified. The Classic Configuration feature is simply a fun (and historically accurate!) way to specify a size.
Because not everybody likes to see files created on the Desktop, you may click the little purple folder icon to have Disk Jockey save its image to another folder.
Disk Jockey and SCSI drives
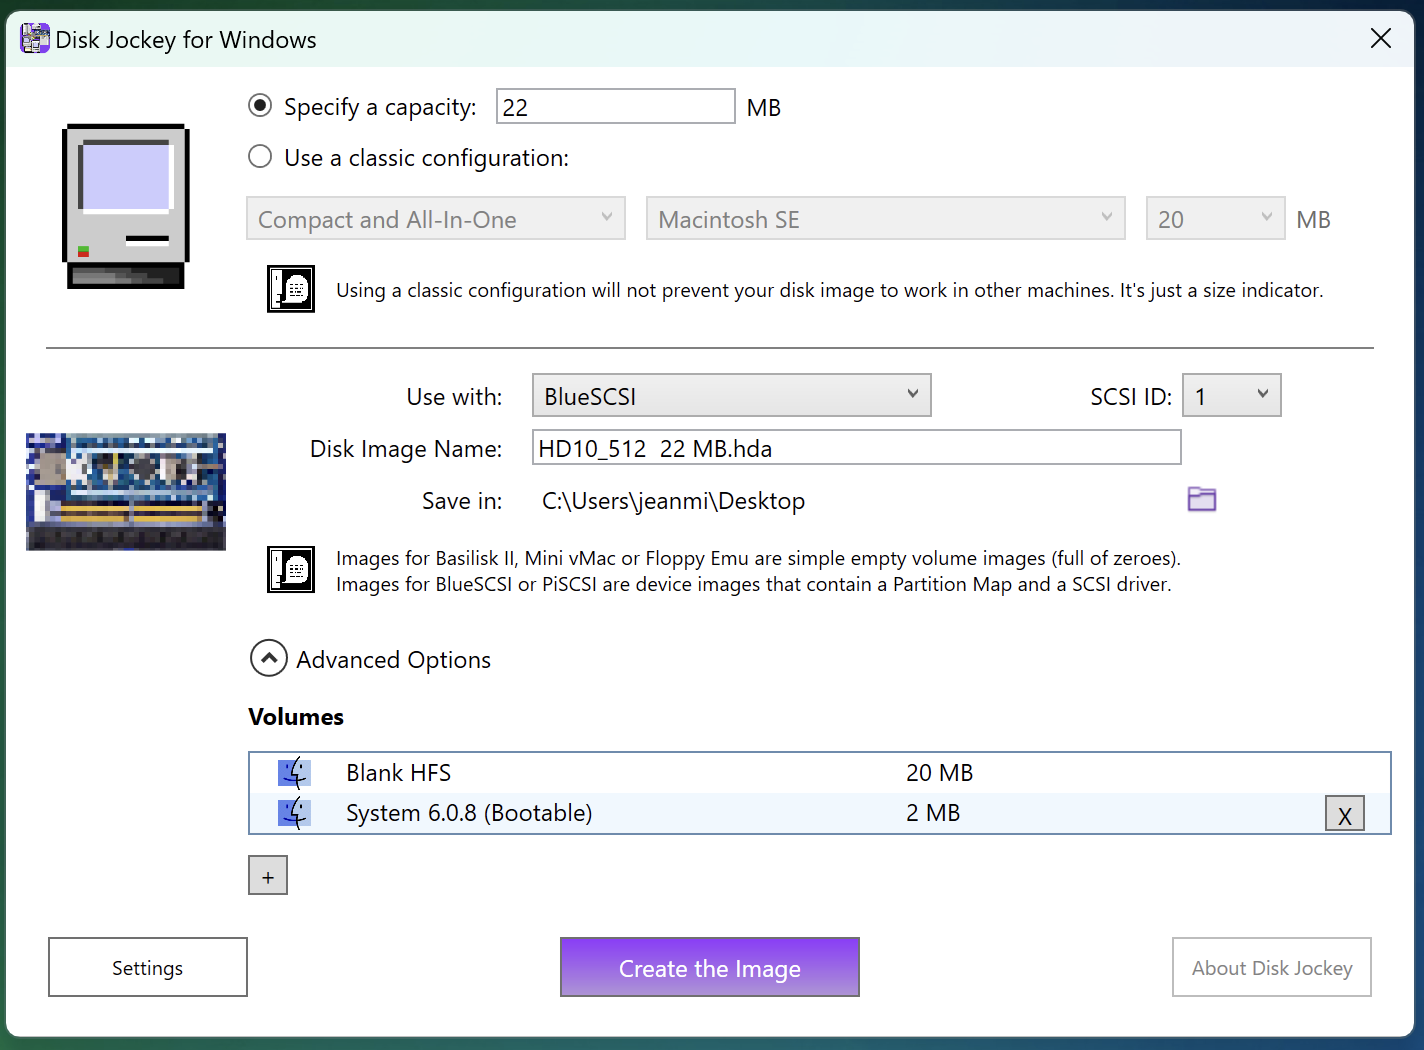
If you tell it you’ll be using the disk image in Snow, BlueSCSI or PiSCSI, Disk Jockey will automatically partition your disk image (creating one volume using all the available space) and install a SCSI driver for you, so it’s ready to go:
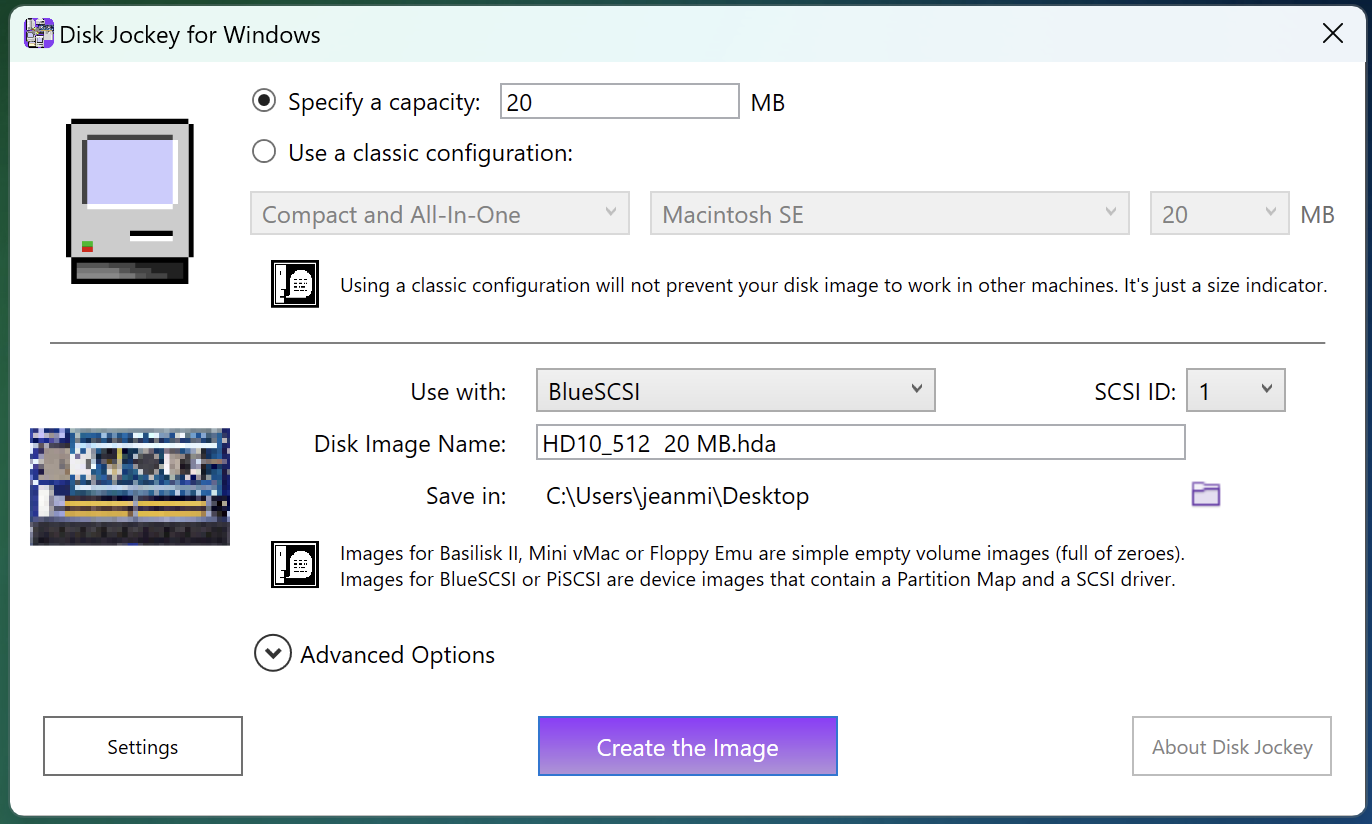
For BlueSCSI, you can also tell Disk Jockey which SCSI ID you want your disk image to be assigned to, and it will name it properly.
Advanced Options for SCSI drives
If you choose to create a disk image for Snow, BlueSCSI or PiSCSI, an “Advanced Options” drop-down menu appears. Opening it will reveal the partitioner.
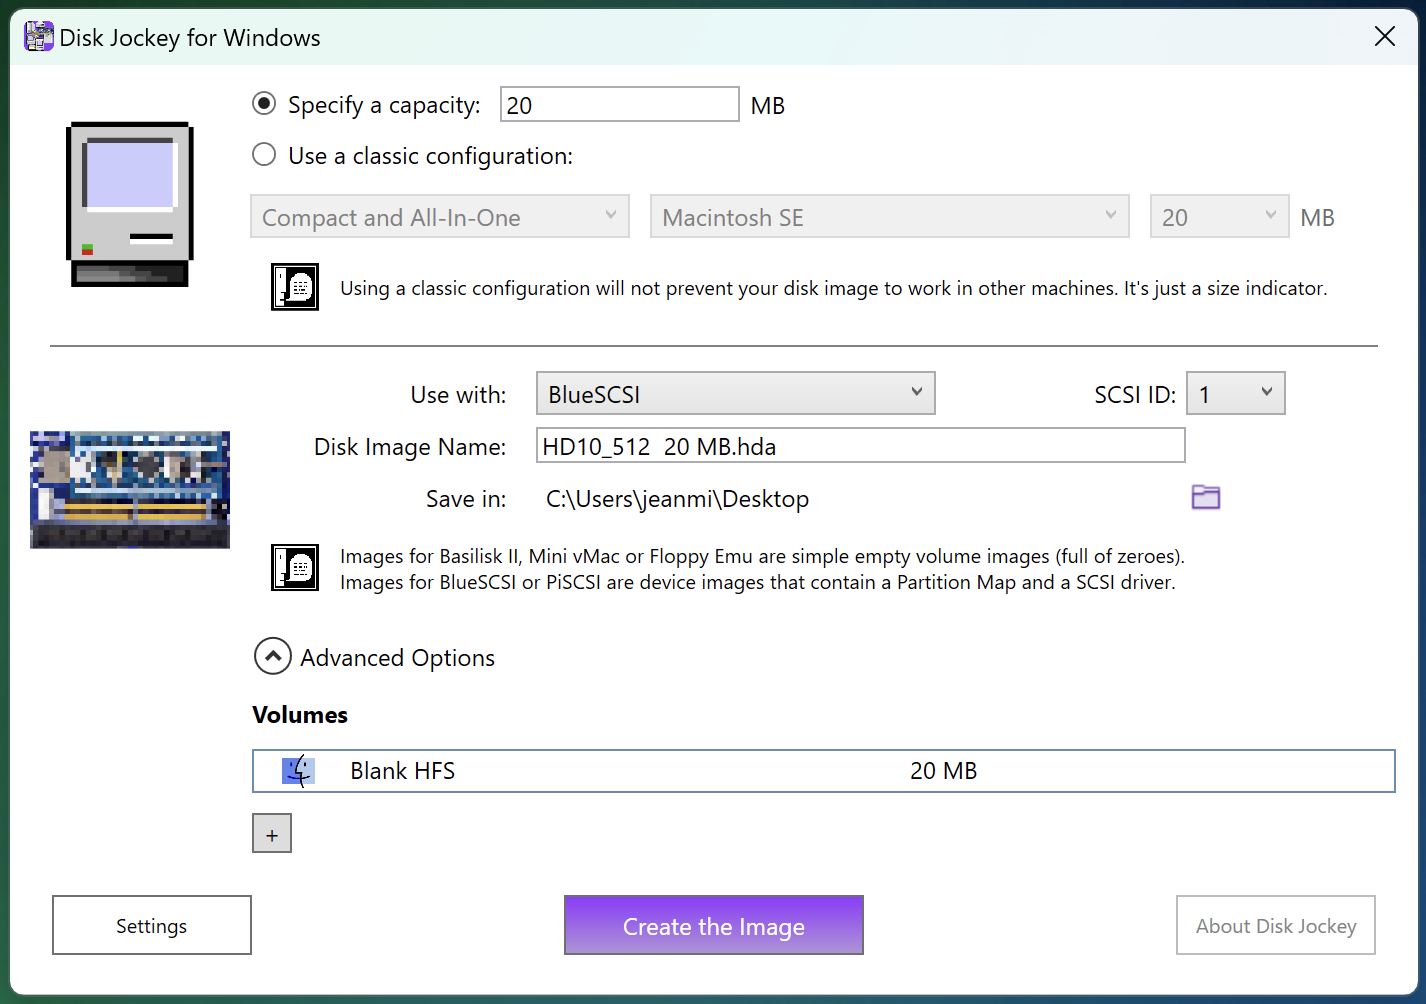
By default, Disk Jockey creates a single partition of the size you requested. But by clicking the “+” button, you can add additional partitions to your disk image.

- “Blank HFS” is an additional HFS volume. You will be prompted for a size. The first time this volume will be used in a Mac, you will be asked to initialize it.
- “Blank ProDOS” is an additional ProDOS volume. You will be prompted for a size but note that, due to the way ProDOS was designed, you will not be able to create a partition larger than 32 MB (33,553,920 bytes to be precise).
- “Existing Image File…” will prompt you for an existing Macintosh image file, either a volume image (like a floppy) or a device image containing several partitions (including ProDOS). The volume or partitions found inside will be added as partitions to your device image. Note that volume images in Disk Copy 4.2 format will be detected and handled appropriately.
Do you have a favorite floppy that you want to include? Do you want to insert Total Replay in a SCSI drive? This is the option for you. - “System 6.0.8 (Bootable)” will add a volume that already contains a full installation of System 6.0.8. If you want to be able to quickly start an old Mac, just add this, force the Mac to start with this device image and off you go.
- “System 7.1 (Bootable)” is the same as above, but with System 7.1.
Note: A traditional partition creator built inside a tool like HD SC Setup 7.3.5 carves an existing hard drive into several volumes. Once all the hard drive’s capacity is allocated to volumes, you’re done.
Because they’re free from the physical constraints of hardware, the device images created by Disk Jockey increase their size according to your needs :) .
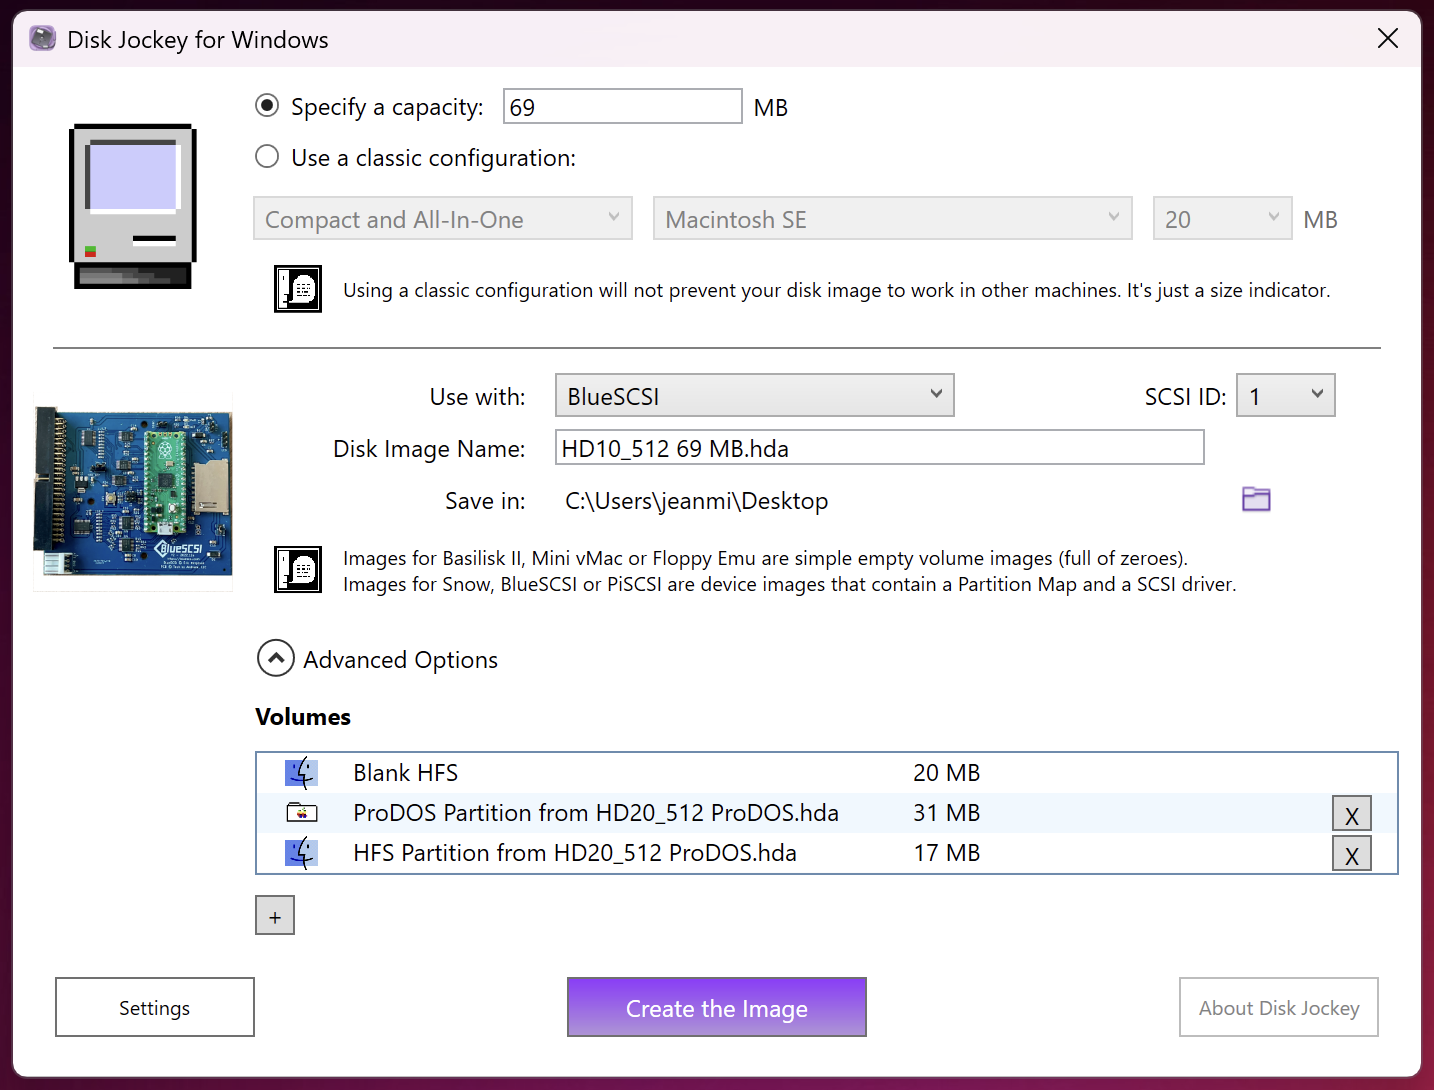
In the example above, the total size of the disk image has increased to accomodate the new partition.
Floppies! CD-ROMs! DVDs!
Disk Jockey can also create images of floppies, CD-ROMs and others. Tell it you want to use a classic configuration and look under “Other”.
Creating a Blank Image Full of Zeroes
If you just want a blank image with nothing in it, simply select one of the non-SCSI options under “Use with” (Basilisk II, FloppyEmu or Mini vMac). Disk Jockey will create an empty file of the size you requested.
Settings

In the “Settings” window, you can
- Turn off the sound effects produced by Disk Jockey
- Enable R.O.N. mode. If you turn on the Really Outrageous Number mode for disk size, your disk images will no longer be limited to 4 GB in size, but to 256 GB.
This is potentially dangerous!!!
Old operating systems were not designed to address more than a few GB of hard drive space and will behave strangely and potentially lose your data.
Also, Disk Jockey will not check whether you have enough available space on your Windows machine to store the image file.
Turn this on only if you know exactly what you’re doing!